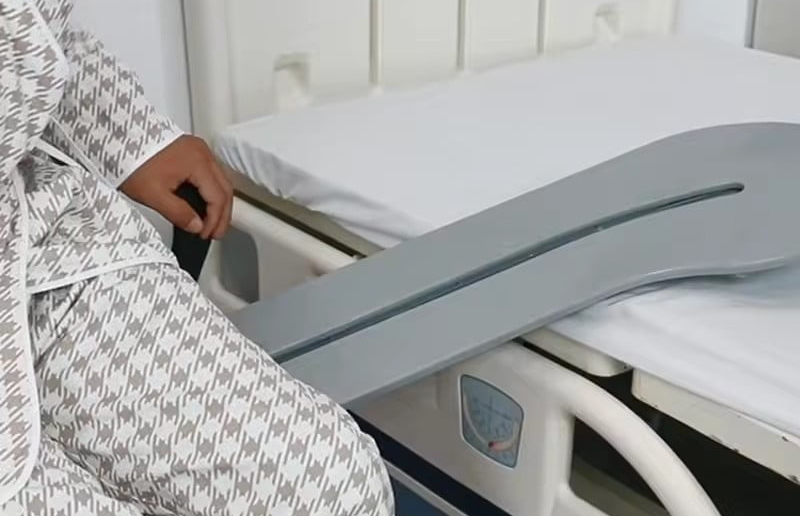
Transfer boards are invaluable tools for caregivers, enabling safe and efficient patient movement while minimizing physical strain. Whether assisting a patient from a bed to a wheelchair or repositioning them on a stretcher, proper use of a transfer board is essential for ensuring safety and comfort. This step-by-step guide provides caregivers with clear instructions on how to use a transfer board effectively, along with tips to optimize the process.
1. What is a Transfer Board?
A transfer board is a flat, sturdy device designed to bridge the gap between two surfaces, such as a bed and a chair, allowing patients to slide across with ease. Made from materials like wood, plastic, or composites, it features a smooth, low-friction surface to facilitate safe and controlled transfers.
2. Preparing for the Transfer
Before using a transfer board, preparation is key to ensuring a smooth and safe process:
- Assess the Patient: Evaluate the patient’s mobility, strength, and cognitive ability to determine if they can assist or require full support.
- Choose the Right Board: Select a board with adequate length, width, and weight capacity for the patient and transfer scenario.
- Inspect the Board: Check for cracks, wear, or damage to ensure it’s safe and functional.
- Gather Supplies: Have gloves, a gait belt (if needed), and any additional staff ready to assist.
- Explain the Process: Communicate with the patient, describing each step to reduce anxiety and gain cooperation.
3. Step-by-Step Guide to Using a Transfer Board
Follow these steps to perform a safe and effective transfer:
- Step 1: Position the Surfaces:
- Align the starting surface (e.g., bed) and destination surface (e.g., wheelchair) as close as possible, ideally at the same height.
- Lock wheels or secure surfaces to prevent movement during the transfer.
- Step 2: Prepare the Patient:
- Assist the patient into a sitting position, if possible, with legs over the edge of the starting surface.
- Use a gait belt or support their upper body for stability, if needed.
- Step 3: Place the Transfer Board:
- Slide one end of the board under the patient’s hips or thighs, ensuring at least one-third of the board is supported by the starting surface.
- Position the other end securely on the destination surface, bridging the gap without wobbling.
- Step 4: Execute the Transfer:
- For patients who can assist: Instruct them to use their arms and legs to slide across the board incrementally.
- For dependent patients: Gently guide their hips and shoulders, sliding them across while supporting their body to prevent tipping.
- Move slowly and steadily, pausing if the patient needs a break.
- Step 5: Complete the Transfer:
- Once the patient’s hips are fully on the destination surface, remove the board carefully from underneath.
- Adjust the patient’s position for comfort and safety (e.g., feet on wheelchair footrests).
4. Safety Tips During the Transfer
To minimize risks and enhance the experience, keep these safety considerations in mind:
- Maintain Body Mechanics: Caregivers should bend at the knees, keep their back straight, and avoid twisting to protect themselves.
- Monitor Patient Comfort: Watch for signs of pain or distress and adjust as needed.
- Secure the Board: Ensure it doesn’t shift during the transfer; use non-slip pads if available.
- Use Teamwork: For heavier or less mobile patients, enlist a second caregiver to assist.
- Avoid Rushing: Take time to ensure each step is completed safely and correctly.
5. Common Mistakes to Avoid
Steer clear of these pitfalls to ensure a successful transfer:
- Improper Board Placement: Placing the board too far under or not securing it can cause instability.
- Overestimating Patient Ability: Assuming a patient can assist when they cannot may lead to falls.
- Poor Communication: Failing to explain steps can confuse or alarm the patient.
- Neglecting Maintenance: Using a damaged or dirty board risks injury or infection.
6. Post-Transfer Best Practices
After the transfer, take these steps to wrap up effectively:
- Check Patient Well-Being: Confirm the patient is comfortable and secure in their new position.
- Clean the Board: Wipe it down with disinfectant to maintain hygiene standards.
- Store Properly: Place the board in a designated, accessible location for future use.
- Document the Transfer: Note any issues or observations in the patient’s care record, if required.
7. Conclusion: Mastering Transfer Board Use for Better Care
Using a transfer board correctly empowers caregivers to provide safer, more comfortable patient transfers while reducing their own physical strain. By following this step-by-step guide—preparing thoroughly, executing with care, and prioritizing safety—caregivers can master this essential skill. With practice and attention to detail, transfer boards become a reliable ally in delivering high-quality patient care.

